Stand Out Without Begging: 10 Trade Show Booth Design Tips!

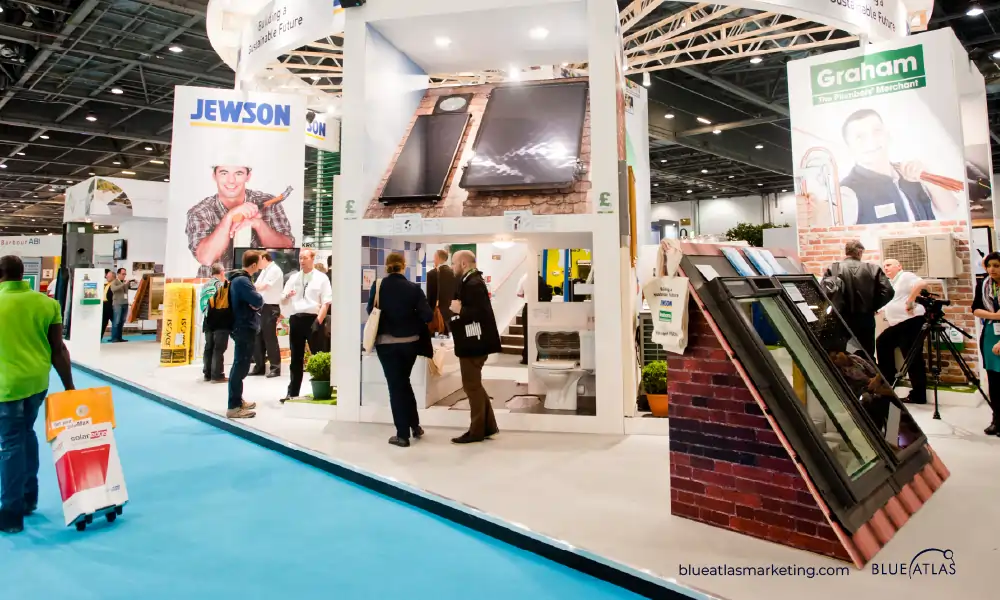
At a trade show, you’re not just competing with nearby booths—you’re battling distractions, motion, and fleeting attention spans. To truly connect with potential customers, your booth must do more than look good—it must reflect your brand identity, support your trade show goals, and follow proven best practices.
In this article, we’ll share 10 trade show booth design tips to help you create a trade show display that attracts, engages, and converts. Whether you’re new to exhibiting or refining your approach, these tips will give your booth a strategic edge.
Key Takeaways:
10 Essential Trade Show Booth Design Tips
Design is another form of communication. Every element should quietly (or loudly) tell visitors who you are, what you do, and why they should care.
I. Maximize Visual Impact with Strategic Color Use
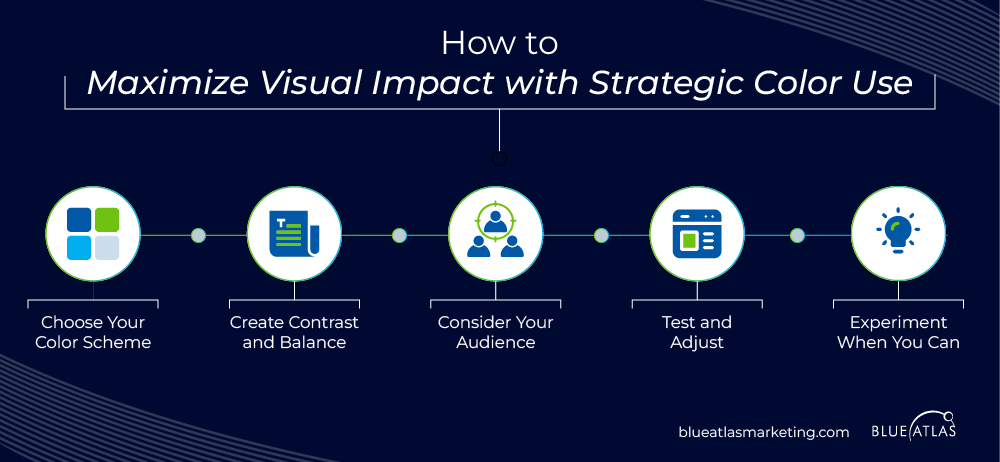
Color isn’t just for looks. It can influence mood, trigger memory, and direct traffic without saying a word.
Done right, your booth becomes a visual magnet that starts conversations before your team says a word. Use it with purpose.
a) Choose Your Color Scheme
Start with your brand colors. They should lead the design, not fight with it.
Two to three primary colors are usually enough. Keep it simple.
b) Create Contrast and Balance
High contrast draws the eye. Use light against dark to highlight products or headlines.
Avoid overwhelming the senses—white space is your friend.
c) Consider Your Audience and Brand Guidelines
Colors can mean different things to different people.Tech audiences may lean toward cool tones.
Natural products? Earthy palettes. Stick to what feels authentic to your brand.
d) Test and Adjust
Don’t just guess—mock it up. What looks great on screen might fall flat on the trade show floor.
Try print versions or booth visualizers before committing.
e) Experiment Where You Can
Your brand colors should dominate, but accents are where you can get creative.
Try metallics, gradients, or even unexpected pops of color to catch attention without creating chaos.
II. Integrate Interactive Technology to Engage Visitors
A static booth blends into the background. Movement, touch, and surprise keep people around longer, and more importantly, get them talking.
Touchscreens, AR filters, and virtual product tours aren’t just flashy add-ons.
They invite people to do something. When a visitor interacts with your content, they’re more likely to remember your brand.
Think simple: a touchscreen quiz about your product or a tablet-based demo. Or go bold with a VR headset or motion-triggered display.
Either way, you’re no longer competing with just visuals but creating an experience.
A reminder: don’t let the tech take over. Use it to start conversations, not replace them.
Live product demos or real-time walkthroughs of your services can pair with interactive screens.
Staff should stay nearby to guide, answer, or jump in with a deeper pitch when someone lingers. It’s not about the device but the moment it creates between the brand and the visitor.
Want more ideas to build an interactive booth that actually pulls people in? Check out this link for more inspiration.
III. Optimize Lighting to Highlight Key Areas

Good lighting doesn’t just make your booth visible…it sets the mood, directs attention, and makes your space feel intentional.
Trade Show Lighting Checklist
Highlight Your Stars – Make key products and signage impossible to miss.
- Use LED PAR Can spotlights (e.g., Chauvet DJ SlimPAR Q12 USB) to focus clean beams on bestsellers or new launches.
- Mount spotlights on adjustable poles or truss arms for flexibility.
- Keep lighting 30–45 degrees off-angle to avoid flattening your visuals.
Create Atmosphere – Soft lighting makes your booth feel inviting—not like a showroom.
- Try softbox-style LED panels (e.g., Neewer 660 LED with diffusers) for warm, even fill light.
- Drape Edison bulb string lights or vintage-look LEDs around lounges or demo zones.
- For minimal setups, clip-on clamp lights with warm bulbs work well on tabletops.
Backlight for Drama – Subtle backlight adds dimension and draws attention.
- Use backlit SEG fabric displays to create glowing branded walls or product headers.
- Place LED light bars or panels behind translucent shelving (e.g., IKEA’s Dioder lights work in a pinch).
- Avoid over-lighting—keep intensity low so your backlight supports, not overpowers.
Play with Brand Colors – Color lighting works best in small, controlled doses.
- Use RGB LED strips (e.g., Govee Smart Wi-Fi strips) under counters, table edges, or shelves.
- Sync color accents with your brand’s palette (i.e., soft blues for wellness, vibrant reds for tech).
- Avoid clashing with your core product lighting—choose complementary tones.
Avoid Glare and Shadows – Poor light placement kills visibility and photos.
- Test lighting angles during booth setup using a phone camera.
- Use diffusers or bounce reflectors (even white foam boards) to reduce harsh shadows on faces or signage.
- Tilt lights to the side of glossy displays instead of aiming directly.
Layer Your Lights – Use different lighting types together for depth and balance.
- Combine ambient overheads, focused task lighting, and colored accents.
- Light key vertical surfaces, walls, product risers, signage—not just tables.
- Make sure no area feels dark or forgotten, even corners or entry points.
Still planning your lighting layout? This resource digs deeper into product-focused display strategies.
IV. Utilize Bold Graphics and Clear Branding
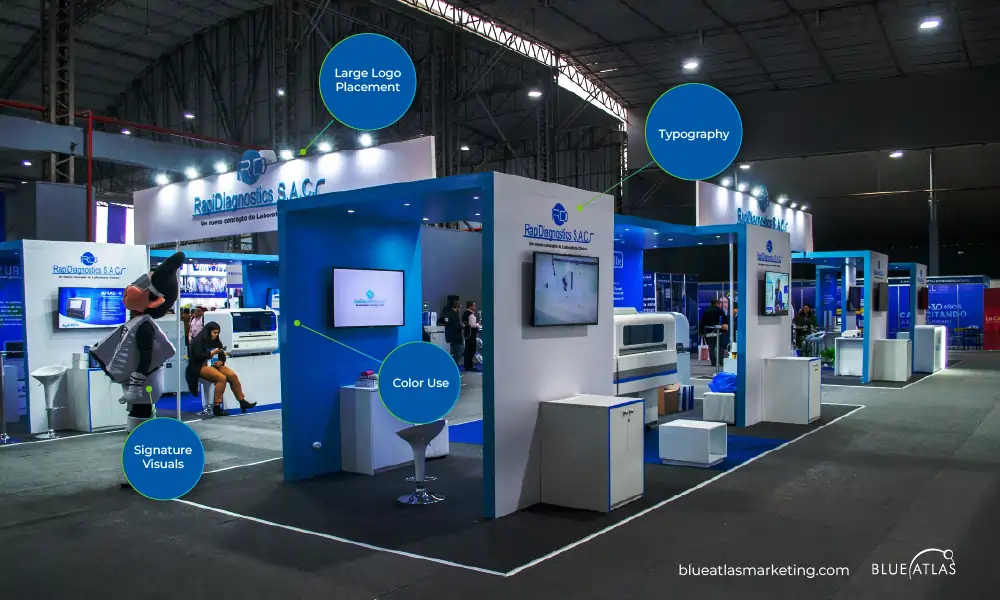
Before you speak, your booth should already be saying something.
Strong visuals and consistent branding are what make people pause.
| What to Focus On | How to Apply It | Why It Matters |
|---|---|---|
| Your Logo | Place it high and large—ideally above eye level or on a central panel | Visitors should know who you are from 20 feet away |
| Color Consistency | Use your official color palette across walls, graphics, and even flooring or props | Builds recognition and keeps the booth visually unified |
| Font Control | Stick with 1–2 fonts used in your brand guide, with clear sizing and spacing | Inconsistent typography looks unpolished and breaks visual rhythm |
| Signature Visuals | Use one large, bold image that speaks to your product or story | Keeps the design clean and focused—less clutter, more impact |
| Graphic Quality | Print in high resolution (150–300 DPI), using vector files for scalability | No one wants to see a pixelated logo or fuzzy image |
| Brand Voice in Design | Use taglines, tone, and layout that match your website and marketing materials | Makes the brand feel consistent across platforms |
Want a deeper dive into trade show visual design? This article breaks it down with examples worth studying.
V. Design for Traffic Flow to Encourage Engagement
A great booth doesn’t just look good, it works like a well-planned route. The easier it is to enter, explore, and exit, the more people you’ll keep inside.
Step 1: Pick the Right Spot
Your booth location can shape how people experience your brand.
- Book early to get corner or endcap spaces with more exposure
- Choose spots near food areas, lounges, or high-traffic aisles
- Avoid being next to large booths that block sightlines
- Look for natural lighting or proximity to entrances
- Ask organizers for past foot traffic heat maps if available
Step 2: Plan Your Entry Points
Make it obvious where people should enter—no guessing games.
- Leave at least 3–4 feet of unobstructed space at the entrance
- Keep counters and product racks away from the entry zone
- Use branded floor decals or arrows to guide foot traffic subtly
- Place your most eye-catching graphic or product near the front
- Avoid rope barriers or stanchions unless necessary for queues
Step 3: Position Engagement Zones
Let your booth invite movement, not cause a traffic jam.
- Center key interactions (demos, touchscreens) inside the booth
- Keep product shelving at waist height for visibility and reach
- Angle screens to avoid tight crowd clusters in front
- Use tall graphics only on the back wall to avoid visual blocks
- Leave room behind demo stations for staff to work comfortably
Step 4: Prep Your Staff
Your team makes or breaks the booth experience.
- Assign clear roles: greeter, presenter, closer, floater
- Practice body positioning—stay visible but not in the way
- Encourage smiles, open gestures, and “soft starts” like offering help
- Avoid clumping—space out staff to cover different zones
- Have a brief staff meeting before doors open to go over the flow
Step 5: Use Visual Cues and Tools
Visuals can do the talking when staff are busy.
- Add simple signs like “Start Here” or “Scan to Demo”
- Use floor arrows or LED strips to mark pathways subtly
- Position brochures or flyers near exits for easy pickup
- Display a QR code near the entry for quick info access
- Use color zoning (e.g., different colored floor tiles) for each area
Step 6: Observe and Adjust
Real traffic never matches the mockup, so stay flexible.
- Watch where visitors hesitate, skip, or cluster too long
- Shift furniture or displays based on foot flow in real time
- Take notes after day one to improve the layout for the next day
- Use your phone to video traffic during busy times for review
- Ask booth staff what’s working and what’s getting in the way
VI. Include Reusable Elements for Sustainability
Smart design isn’t just about looks but also about long-term use. A sustainable booth saves on cost, time, and waste:
Start with your materials. Use recycled or reusable options like aluminum, bamboo, fabric panels, or reclaimed wood. They’re sturdy, lightweight, and travel-friendly.
Modular components are a must. Frames that snap together, panels that reconfigure, and signage that fits different booth sizes let you adapt without starting from scratch.
For branding, keep your main visuals timeless–your logo, tagline, and product categories.
Then use smaller, swappable signs or digital screens for event-specific messages.
Even your shipping setup can be eco-smart. Foldable tables and wheeled crates protect your gear and make logistics easier.
You don’t need to sacrifice style to be sustainable—just plan with reuse in mind.
VII. Incorporate Multi-Level Design for Visibility
Going vertical isn’t just a space solution, it’s a strategy.
Adding a second level gives your booth more presence, more room, and more potential.
| Design Feature | Use Case or Tip | Added Benefit |
|---|---|---|
| Second-Level Platform | Use for VIP meetings, quiet lounges, or exclusive demos | Extends engagement time with high-interest visitors |
| High-Mounted Graphics | Install branding above 12 ft for visibility across the hall | Catches attention before visitors even reach your aisle |
| Two-Zone Functionality | Keep demos and giveaways on the ground; upstairs for private or longer discussions | Reduces crowding and organizes visitor flow |
| Open Stair Access | Avoid enclosed stairs—keep them visible and easy to approach | Sparks curiosity and invites foot traffic to the upper level |
| Architectural Branding | Wrap railings, columns, and support beams with your brand colors and messaging | Turns your booth into a structural extension of your brand |
VIII. Focus on Modular Components for Flexibility
Booths that adapt win more shows. Modular design helps you reuse, reconfigure, and refresh without starting from scratch.
Smart Ways to Use Modular Booth Components
- Interchangeable Wall Panels – Use lightweight panels that connect with magnets or clips. They can be rearranged or replaced between events with minimal effort.
- Stackable and Collapsible Furniture – Choose chairs, tables, and shelves that fold flat or stack. Easy to ship, quick to store, and ideal for different booth sizes.
- Adjustable Display Racks – Use racks with movable shelving or signage hooks. You can adapt them to different product types or change the layout based on foot traffic.
- Branded Lightboxes – Swap out fabric graphic skins on LED lightboxes to update messaging without replacing the entire frame.
- Flooring Tiles or Modular Mats – Use puzzle-style flooring for easy setup and teardown. It also lets you resize the footprint depending on booth dimensions.
- Pop-Up Counters and Kiosks – Look for counters that fold into travel cases. Some even double as storage or include built-in screens.
- Digital Displays with USB or Cloud Control – Reprogram content easily between shows. No need to reprint anything—just update your files.
IX. Employ Creative Product Displays
Start with the foundation: your booth design. Keep the layout clean and purpose-driven.
Don’t overcrowd the space–less is more when it comes to product visibility. Use neutral backgrounds and proper lighting to make your products the star.
Vertical space helps, too. Shelving or wall mounts can draw attention without taking up valuable floor area.
Next, focus on product selection. You don’t need to bring your full inventory,just the right mix.
Choose bestsellers, new launches, or anything visually compelling. If possible, offer size, color, or use case variations to show range.
Keep backup stock stored but out of sight. You want your space to feel curated, not cluttered.
Finally, think through your display methods. Mix static and interactive formats.
Place products at eye level when possible and allow for hands-on access. Use risers, product stands, or rotating displays to add movement and depth.
If a product is technical or complex, add a video screen or live demo nearby.
Every product should have a clear reason for being there—and a way for visitors to engage with it.
X. Ensure Accessibility for All Attendees

If people can’t enter, move through, or interact with your booth, you’re missing out.
Accessibility should be on your business side.
Keep Pathways Clear and Wide
- Ensure walkways are at least 36″ wide to accommodate mobility devices
- Avoid placing furniture or displays in corners that block turning space
- Use low-pile flooring or flat mats—avoid raised edges that cause tripping
Make Content Reachable
- Place key signage, brochures, and touchscreens at 36″–48″ height
- Use angled displays to improve visibility from a seated position
- Keep product shelves accessible without requiring a step or a bend
Offer Multiple Interaction Options
- Pair touchscreens with printed guides or QR codes
- Use captions or visual aids for video and audio presentations
- Provide handheld tablets for visitors who can’t reach mounted displays
Be Mindful of Lighting and Sound
- Avoid flashing lights or rapid animations that can be overstimulating
- Provide quiet zones or soft lighting areas for sensitive visitors
- Keep audio at a controlled level to avoid sensory overload
Train Your Team for Inclusion
- Teach staff how to assist respectfully (ask first, don’t assume)
- Have printed materials available in large text
- Welcome assistance animals and make space for them to rest
Want more guidance on building an inclusive booth that works for everyone? This article breaks it down with practical tips.
Frequently Asked Questions (FAQs)
What are the key elements of a successful trade show booth design?
Clear branding with your company name, a smart layout, and engaging visuals are essential. These elements of your design help attract attention and create a lasting impression.
How can technology enhance the trade show experience?
Interactive tools like touchscreens and AR demos capture the attention of passerby and offer new exhibitors a dynamic way to showcase products and services.
It draws people in—think touchscreens, AR demos, and interactive displays.
What strategies work best for engaging visitors at a trade show?
Create enough space for easy movement, offer hands-on experiences, and keep team members approachable to encourage meaningful interactions.
How can I measure the success of my trade show booth?
Monitor lead counts, track how many business cards are collected, review visitor feedback, and analyze overall engagement to assess effectiveness.
Your booth space is a powerful opportunity to stand out. By applying the trade show booth design tips above—from smart lighting to flexible layouts—you’ll create the perfect trade show booth that draws attention and drives engagement. It’s a great way to support your team members, make meaningful connections, and strike the right balance between creativity and strategy on the show floor.
Why Choose Blue Atlas Marketing?
Your exhibit booths should do more than just fill space—they should attract, engage, and convert. At Blue Atlas Marketing, we combine strategy and creativity to make it happen. Ready to elevate your presence at your next trade show? Let’s build something unforgettable—contact us today!


